
Back in the early 90's I talked my wife into letting me buy
a used wet saw for tile and brick.
What a good purchase it was as I have used it a lot over the years.
(To see a rewrite of this post please go to
Discount Ceramic And Stone Tile Work.)
(To see a rewrite of this post please go to
Discount Ceramic And Stone Tile Work.)

The above letters are bits of tile set into Indiana limestone.
I cut the limestone into narrow pieces ( you can just see this
in the above photo ) so that I could cut out the numbers
with some degree of difficulty. After the limestone was set
I could set in the numbers. The small sizes for the numbers
made them very hard to cut out.

The triangles on the inside were done the same.
The small pieces of both limestone
and tile meant I could use up a lot of scraps.
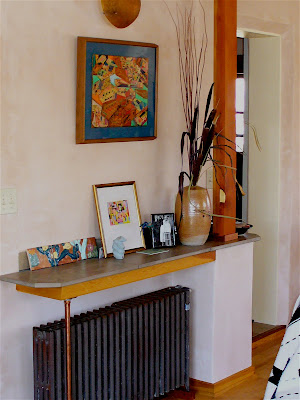
In the living room we wanted to cover the radiator
so we made a counter out of the same Indiana limestone.
Years before I had bought a whole pallet of Indiana limestone
in 3/4" and 2" square pieces at the local stone yard
that was left over from a large order.
They wanted to get rid of it
and gave me a great price to take it all away.

There is a discount tile and carpet shop in Santa Fe
and Chuck, who owned it, turned me on to the large size tile.
He was a wealth of information about tile.
At the time all his discount tile was one dollar a square foot
and if one was able to check often enough you could find
really nice porcelain or Italian tile in limited quantities.
They were end runs or discontinued tiles.
Of course he would also order anything we wanted.
Above is a 16" porcelain tile even though it doesn't look that large.
A strip of walnut makes a nice border with the solid maple floor.

This nice 18'' porcelain is over the kitchen sink looking into the
sun room. (See the post on Passive Solar, towards the end of the post).
The insets are pieces of fine Chinese porcelain.
Years ago a friends of ours son accidentally broke part
of a collection and we were more than happy to save them
from the trash and use the pieces in mosaics.

This shows the bathroom. The field is 12"x12" tiles and the border
is a baseboard ( they were free from Chuck who wanted them
out of the way ) which I cut the triangles out of to make the trim.
The window sill is cast in place concrete.
The wall is adobe which is why it is so wide.
The big problem with the large tile size is that the surface
you are tiling on must be in a flat plane.

This is looking down over the tub and shower.
See the post from 2/10/10 on Passive Solar for more on this.

The trim in this shower is made from narrow cut offs
allowing me to use up some of the scraps.
The floor and trim "dots" were leftover from the kitchen floor
13"x13" tiles. I cut them into 2"x 2" pieces to more easily conform
to the slope in the floor.
Believe it or not this is a 3'x3' shower, the minimum size in my book.